Write the ingredient on the marker
Start with the recipe wording: fresh leaves, flowerheads, green heads or mature dried seed. Those requests describe different harvest stages. If you need only chopped leaves, there is no reason to reserve every plant through seed ripening. If you need seed, the final flowering stage must have room in the plan from the start.
Two useful items are the Fiskars Micro-Tip snips for selected soft material and Bosmere plant markers for keeping batches distinct. Write the cultivar, sowing date and intended harvest. Existing clean scissors and readable labels can fill the same roles; buy around a missing task rather than accumulating duplicate equipment.
Put a different label on plants reserved for seed so another cook does not keep cutting their developing heads. If your household shares the patch, agree on where leaf picking is allowed. Clear allocation is especially useful in a small space, where a single well-intended cleanup can remove the entire intended seed crop.
Divide the space by time as well as area
Use separate short rows, patches or pots for successive sowings. Keep at least one future position available before sowing the first batch. If every inch is planted on day one, the next sowing either waits for the old crop to finish or becomes mixed into it, and the overlap you intended never actually exists.
For a simple example, label three positions A, B and C. A supplies the first leaves, B establishes behind it and C remains available for the next sowing. Keep seed plants elsewhere if they would prevent the rotation of those positions. This is a layout example, not a claim that three batches fit every season or household.
Count the physical space at the stage you will retain. Plants removed during a young leaf harvest do not occupy the same height and width as plants kept to full seed maturity. Use the dill profile and the selected cultivar’s instructions to plan that later footprint. Leave room to put a collection bag around heads without trampling the replacement crop.
Use a trial interval, then watch the overlap
Illinois suggests sowing dill every two weeks; Minnesota suggests two to three weeks through midsummer. These are starting schedules to test against your actual harvest, with regional growing conditions still setting the limits. Illinois Extension: dill Minnesota Extension: growing dill
Begin with a modest batch and record emergence, first useful picking and obvious flower development. Compare the next sowing with that timeline. If the older batch is nearly finished while replacements remain tiny, the overlap is too small for your needs. If several large batches are ready together and mostly unused, you can reduce the quantity or widen the interval.
Adjust one part of the plan at a time so the result remains interpretable. Changing cultivar, sowing size, position and interval together makes it difficult to know what helped. The seed-starting planner can record timing assumptions around a planting target, but your observations must decide whether another sowing still has a useful window ahead.
Put seasonal limits ahead of repetition
RHS warns that hot, dry conditions can bring premature flowering and restrict further leaf growth. UF/IFAS instead emphasizes a Florida sowing window from September through December, with spring also possible. These examples show why repeated sowing needs a local seasonal boundary. RHS: growing dill UF/IFAS: dill in Florida
Look ahead before opening the next packet. Will you be present to maintain the seedbed? Are conditions likely to support establishment? Is the proposed harvest leaves or a later seed crop? If the answer is uncertain, sow a small labeled trial rather than committing the whole remaining bed to an assumption.
A gap in fresh dill can be a sensible outcome when the season becomes unsuitable. Plan meals accordingly or use an appropriate stored ingredient where the recipe allows it. Do not treat a pause as failure that must be solved by more seed. Keep the best-performing batch dates in your notes so the following year begins with local evidence.
Start where the roots can stay
Minnesota recommends direct sowing because dill does not transplant easily. Keep the soil relatively moist while plants establish and thin seedlings deliberately. A dense patch of emergence is a starting population, not the final spacing for plants kept through flowering. Minnesota Extension: growing dill
Prepare and label the final position, follow the packet’s depth guidance and water in a way that does not wash seed into an unmarked corner. If one patch fails, record its conditions before repeating it. Resowing into a separate marked area helps you distinguish a delayed first emergence from the new attempt.
When transplants are necessary, choose young plants and move them with care for the intact root ball. Use hardening off for plants raised indoors. Avoid holding a growing tray indefinitely while waiting for occupied ground to clear; that is a scheduling conflict to resolve before sowing the next tray, not a reason to expect the roots to wait.
Harvest leaves while the batch can still support the cut
RHS allows picking a few leaves from young dill and advises keeping at least a third of the plant to continue growing. That is a ceiling on removal, not an instruction to take the maximum at every visit. A small or stressed plant may warrant much less. RHS: growing dill
Choose enough foliage for the meal, locate the cutting point and keep neighboring stems out of the blades. Inspect the material as it enters the bowl. A tall central flower stem should not be casually severed on a plant reserved for seed. If only leaves are wanted, note the start of flowering as a signal to check the next batch.
Use harvested leaves promptly. Minnesota notes that fresh dill loses flavor quickly and that drying loses much of its flavor. If a batch exceeds immediate use, make an intentional preservation choice before cutting everything at once. Fresh leaves, dried leaves and mature seed should not be treated as equal measures of the same ingredient. Minnesota Extension: growing dill
Keep green heads distinct from mature dry seed
Minnesota describes flexible green heads with developing seed for its pickling use, while mature spice seed is allowed to ripen and dry. This guide concerns the garden harvest; follow the specific tested recipe when preserving food and use the stage of dill it calls for. Minnesota Extension: growing dill
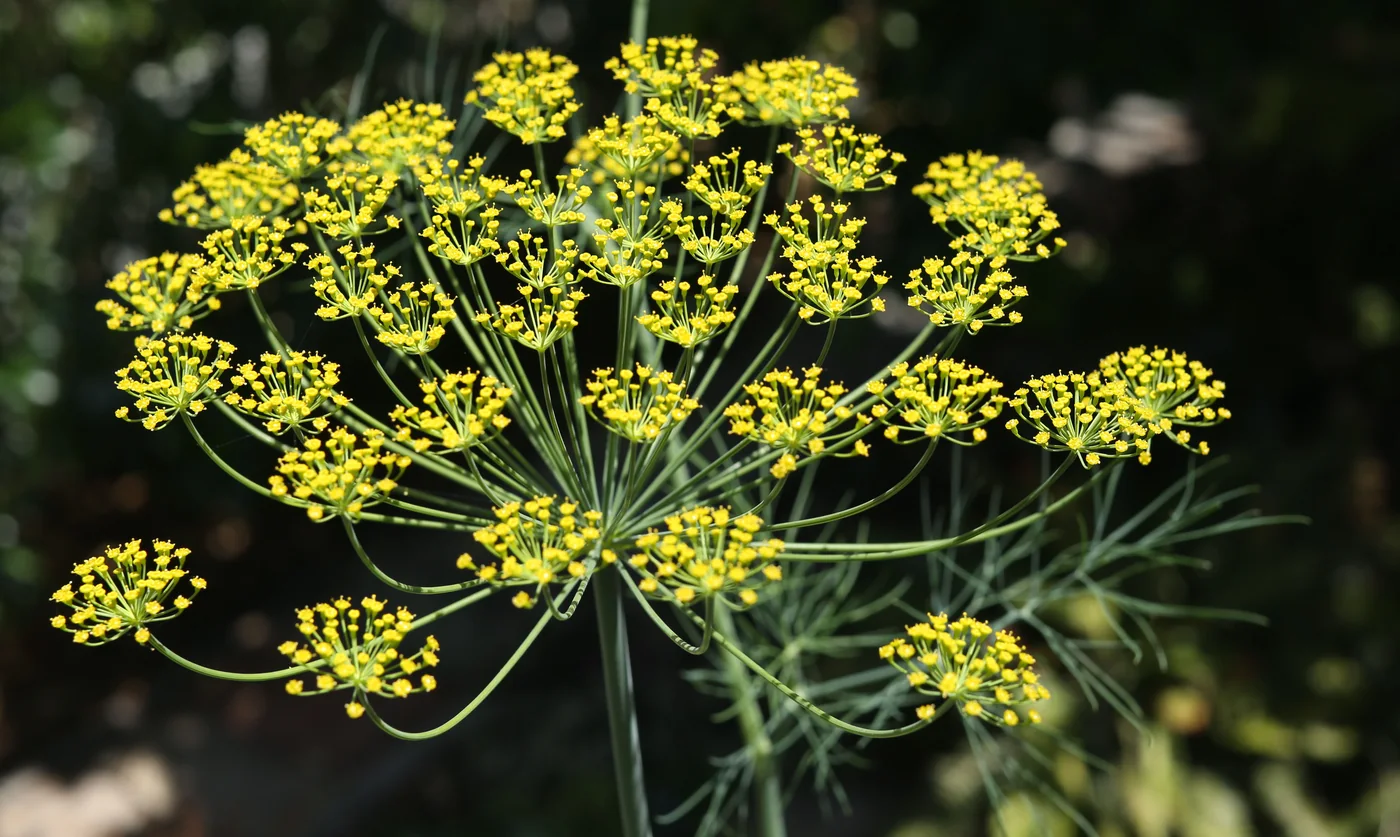
Before taking a head, compare it with the intended ingredient. A yellow flower display, a green developing head and a browning seedhead are visibly different. Put only the selected stage into that harvest batch. Do not gather every head simply because a cooking project is scheduled and then assume the mixture can be substituted without checking the recipe.
If kitchen timing and crop timing do not match, change the ingredient source or postpone the garden harvest. The plant does not owe you mature seed on the day cucumbers arrive. Record when useful heads actually developed; that helps you choose a better sowing date next time while acknowledging that weather will still affect the result.
Catch seed before it becomes a volunteer crop
Utah State advises collecting when seedheads turn brown and ripe seed releases readily. A paper bag around the mature heads catches seed while it finishes drying. Choose the stage of the individual head rather than relying on one calendar date for the whole patch. Utah State Extension: dill
Have labeled bags and a dry, ventilated holding space ready before cutting. Work through the plants gently, since mature seed can fall during handling. Keep different cultivars or sowing lots separate. Remove non-seed debris during cleaning, and keep the collecting arrangement accessible for regular inspection rather than leaving it forgotten in a closed shed.
Texas A&M advises drying harvested seed thoroughly and keeping it in labeled containers in a cool, dark, dry location. Texas A&M AgriLife: growing culinary herbs
Keep seed intended for planting separately labeled from kitchen spice. Inspect the stored lot before using it, and do not retain moldy material. The seed-saving guide covers the additional identity and storage decisions involved in retaining a sowing lot.
Retire each batch on its own evidence
NC State recognizes dill as a butterfly host. A retained flowering plant may therefore have a purpose even after its leaf harvest is over. Identify caterpillars and decide whether you are sharing that plant before treating ordinary feeding as an unexplained crop emergency. NC State: dill
At cleanup, remove the plants whose chosen job is finished and leave only clearly identified exceptions. Check whether fallen seed has begun a new population. Keep wanted seedlings only where their identity and position are suitable; otherwise clear the space for a deliberate sowing. A volunteer is an opportunity to evaluate, not an obligation to rearrange the whole bed.
Compare the batches by useful harvest and overlap. Note whether you had enough leaves, too many heads or a seed crop that occupied valuable space longer than expected. Change the next plan around that specific result. Continuous fresh dill is a seasonal scheduling achievement, while mature seed is a separate harvest that deserves its own time and place.
Sources & further reading
We favor university extension guidance and original product documentation. Linked sources support the specific facts cited; they do not endorse Garden Gear Atlas.
- NC State: dill
- Illinois Extension: dill
- Utah State Extension: dill
- RHS: growing dill
- UF/IFAS: dill in Florida
- Minnesota Extension: growing dill
- Texas A&M AgriLife: growing culinary herbs
.jpg)